SSH for Newbies

I'm sure everyone's familiar with the phrase "SSH into a machine." But before writing this article, I only knew that SSH consisted of three English words—nothing else. 🫠 So today, let's learn about the magic of SSH and how to connect with it more conveniently!
Seriously, what is SSH?
Secure Shell Protocol, also known as SSH, allows users to control and access remote servers through a secure channel. SSH is built into macOS and Linux, allowing us to connect to remote servers directly from a terminal.
ssh username@remote-server-ipThe SSH connection process goes through five steps. You can use the -v, -vv, and -vvv options to monitor the connection progress. More v options indicate more detail (and verbosity).
ssh -v username@remote-server-ipYou'll see a bunch of messages spewing out of the terminal.
OpenSSH 9.0p1, LibreSSL 3.3.6
debug1: Reading configuration data /Users/cooper/.ssh/config

...

debug1: channel 1: connected to /var/tmp/fig/cooper/secure.socket port -2
Next, let's break down each step and compare it to the previous message.
1. Establishing a TCP Connection
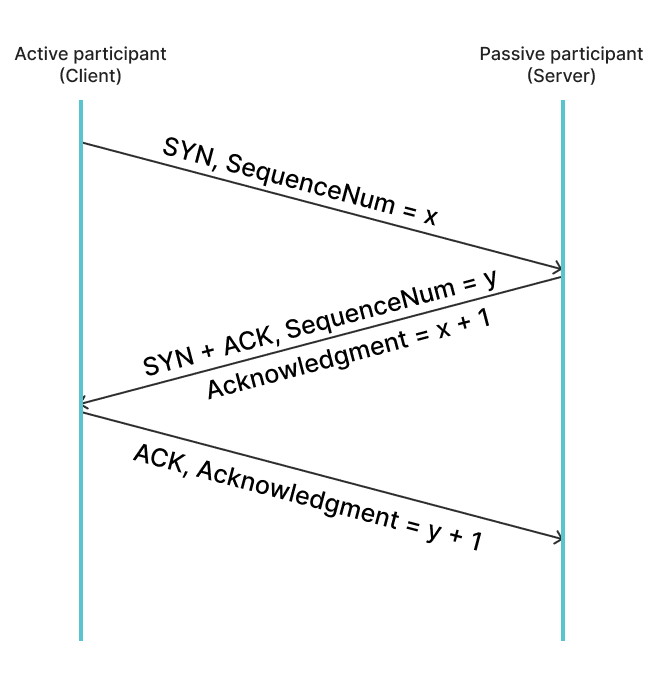
First, the client establishes a TCP connection with the server. The client sends a synchronize (SYN) packet to the server, which contains a randomly generated Initial Sequence Number (ISN).
After receiving the SYN, the server increments the client's sequence number by 1 as an acknowledgement (ACK), then adds its own sequence number and returns it to the client, indicating that it has received the SYN from the client. This response is typically referred to as SYN-ACK or SYN/ACK.
A timer is set in both steps; if the expected response is not received within a certain period of time, the packet is automatically resent.
After receiving the SYN-ACK from the server, the client also increments the server's sequence number by 1 as an acknowledgement (ACK) and returns it to the server. This completes the TCP three-way handshake.
We can see Connection established in the terminal, indicating that the TCP connection has been established.
debug1: Connecting to remote-ip-address [remote-ip-address] port 22.
debug1: Connection established.
2. SSH Protocol Version Exchange
The server and client then exchange SSH protocol versions to confirm compatibility and determine which protocol version to use for communication.
From the terminal, we can see that the local SSH version is OpenSSH_9.0, while the remote SSH version is OpenSSH_8.9p1. Finally, OpenSSH_8.9p1 is used for communication.
debug1: Local version string SSH-2.0-OpenSSH_9.0
debug1: Remote protocol version 2.0, remote software version OpenSSH_8.9p1 Ubuntu-3ubuntu0.3
debug1: compat_banner: match: OpenSSH_8.9p1 Ubuntu-3ubuntu0.3 pat OpenSSH* compat 0x04000000
3. Session Encryption Negotiation
Once the SSH version is determined, Session Encryption Negotiation begins.
At this point, the client and server generate temporary private-public key pairs and exchange public keys. Each party then uses the other's public key and their own private key to independently calculate a shared secret using a key exchange algorithm. This shared secret is used to encrypt data transmitted throughout the SSH session.
Then go back to the terminal and take a look:
debug1: kex: algorithm: sntrup761x25519-sha512@openssh.com
debug1: kex: host key algorithm: ssh-ed25519
debug1: kex: server->client cipher: chacha20-poly1305@openssh.com MAC: <implicit> compression: none
debug1: kex: client->server cipher: [email protected] MAC: <implicit> compression: none
First, the leading "kex" indicates Key Exchange.
The first line indicates that the client and server will use [email protected] as the key exchange algorithm to generate the shared secret. The second line indicates that the host key the user is attempting to log in with is calculated using the ssh-ed25519 algorithm. Finally, the third and fourth lines indicate that the client and server have agreed to use the [email protected] algorithm and a shared secret as the key to encrypt messages throughout the SSH session.
4. User Authentication
After the client and server have decided on the key exchange algorithm to use, user authentication begins.
In the terminal, you can see that the server supports publickey and password authentication methods. Here, we will use publickey for authentication. After the server receives the key, user authentication is complete!
debug1: Authentications that can continue: publickey,password
debug1: Next authentication method: publickey
debug1: Offering public key: ...
debug1: Server accepts key: ...
Authenticated to remote-server-address ([remote-server-address]:port) using "publickey".
5. Establishing an SSH tunnel
After the server authenticates the client and generates a shared secret, the client and server can use the shared secret to encrypt and decrypt packets. Finally, the server opens a shell environment, allowing the client to operate the server through the shell. This "channel" that allows communication between the two parties is called an SSH tunnel.
Finally, in the terminal, you can see that the SSH tunnel has been established.
debug1: channel 1: new [forwarded-streamlocal]From this point on, all transmitted packets will be symmetrically encrypted using the shared secret. The entire packet can be broken down into five parts:
- Packet Length (4 bytes) - Indicates the total packet length, excluding the MAC and Packet Length fields. If the payload is compressed, the compressed length is calculated.
- Padding Length (1 byte) - Indicates the length of the Padding field.
- Payload - The actual data to be transmitted. If compression is used, only the Payload is compressed.
- Padding Field - Random bytes encrypted along with the actual data (payload), making it more difficult for malicious parties to read the actual data. The minimum length must be 4 bytes, and the maximum length is 255 bytes.
- Message Authentication Code (MAC) - Contains the algorithm used for authentication, checking for packet tampering.
Except for the message authentication code, all other data is encrypted with a shared secret.
Now that you understand how SSH works, let's learn how to connect to your machine more quickly and securely!
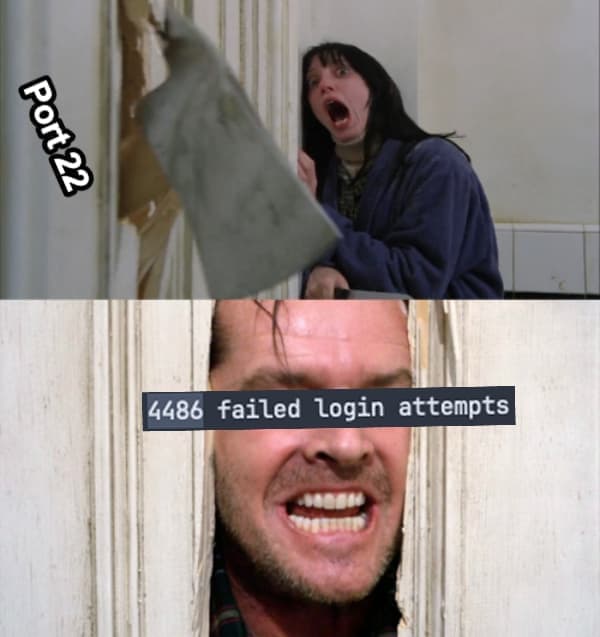
Change the default port to prevent excessive login attempts on your machine
The default SSH connection port is typically 22. If your machine is detected, it will be destroyed!
So we need to change the default port! Here we'll introduce two methods: using iptables and firewalld.
iptables
iptables is a command-line tool used to manage firewalls and packet filtering in Linux systems. It manages inbound and outbound traffic through different chains.
- Edit the
sshd_configfile in/etc/ssh
sudo vim /etc/ssh/sshd_config- Find the line that says
Port 22(you can find it by pressing/and typing22) and change the port to another port, for example, 20388.
Port 20388- Save and exit the file.
- Use the
systemctlcommand to restart the sshd service and start listening on the new port.
sudo systemctl restart sshdSystemd uses the systemctl command to manage various system services. Here, we restart (restart) the sshd service.
sshd is the OpenSSH daemon that continuously listens for SSH connections from clients and handles them accordingly. Other service operations include stopping (stop), starting (start), and checking its status (status). The sudo systemctl restart sshd command is equivalent to sudo systemctl restart sshd.service, omitting the .service at the end.
- Add a rule to allow the port you just adjusted to pass through the firewall.
sudo iptables -A INPUT -p tcp --dport 20388 -j ACCEPT-A INPUT means we want to append a new rule to the INPUT chain. There are also FORWARD and OUTPUT chains.
These chains manage incoming and outgoing connections. For example, the INPUT chain manages all packets entering the server, the OUTPUT chain manages all packets leaving the system, and the FORWARD chain manages all packets "passing through" the system—packets that are not destined for the system but are simply routed through it. These three chains are also called filter tables. Rules in iptables are compared one by one from top to bottom. If a condition is met, the packet is processed according to that rule, and no further matching is performed.
-p tcp applies this rule to connections over TCP. --dport defines the destination port, which can be a single port, like 20388, or a range of ports, such as 20388:20340.
-j defines where these packets should "jump" to. iptables allows four destinations by default:
ACCEPT - Accepts the packet and stops here, without further matching to other chains.
REJECT- Rejects the packet and tells the sender, "I rejected it, haha!" The command stops here and does not continue to compare rules in other chains.DROP- Does nothing; silently ignores the packet and stops here, does not continue to compare rules in other chains.LOG- Logs the packet and continues to compare rules.
- Finally, use
Dropto ignore connections on Port 22.
sudo iptables -A INPUT -p tcp --dport 22 -j DROPThat completes the configuration! If you connect using the default port 22, you should eventually receive a "Connection timed out" error message.
firewalld
firewalld uses "zones" to define different trust levels and policies to manage and filter traffic between zones.
Firewalld divides configurations into "Runtime Configuration" and "Permanent Configuration". The former only applies to the current session and will disappear after a restart or reload. The latter does not take effect immediately but becomes permanent after a restart or reload.

After installing firewalld, there are nine default zones: drop, public, trusted, block, dmz, external, home, internal, and work.
Each zone has different settings and trust levels. For example, drop drops all incoming connections and only allows outgoing connections; public is the default zone, allowing common services such as http, https, and ssh; trusted allows all connections.
If you have Docker installed, a docker zone will automatically be created, placing all network interfaces generated by Docker within the docker zone.
Next, let's see how to configure the port using firewalld!
Firewalld Port Configuration
- Allow TCP connections on port 20388. Without the
zoneoption, the default is the public zone.
sudo firewall-cmd --add-port=20388/tcp --permanentThe --permanent flag marks the setting as permanent, requiring a reload to take effect. Without the --permanent flag, the default is the runtime config.
- Reload the firewalld daemon
sudo firewall-cmd --reload- Check that the port is set correctly
sudo firewall-cmd --list-allIf everything goes well, you should see that the port is set correctly!
public
target: default
icmp-block-inversion: no
interfaces:
sources:
services: ...
ports: 20388/tcp
protocols:
forward: yes
masquerade: no
forward-ports:
source-ports:
icmp-blocks:
rich rules:- Edit the
sshd_configfile located in/etc/ssh
sudo vim /etc/ssh/sshd_config- Find the line that says
Port 22(press/and type22to find it) and change the port to 20388.
Port 20388If you want to support multiple ports, you can continue to add them below. For example:
Port 20388
Port 20400
Remember to repeat the firewalld configuration.
How to access the machine without entering a password or IP address
After completing the port configuration, you can quickly access the machine using the hot port!
- Create public-private key pairs and specify the file name and path. The
-tparameter specifies the algorithm to use to generate the keys. Here we call itid_rsa_remote_vps
ssh-keygen -t rsaOr use the ed25519 algorithm, which has a smaller key size and is more secure.
ssh-keygen -t ed25519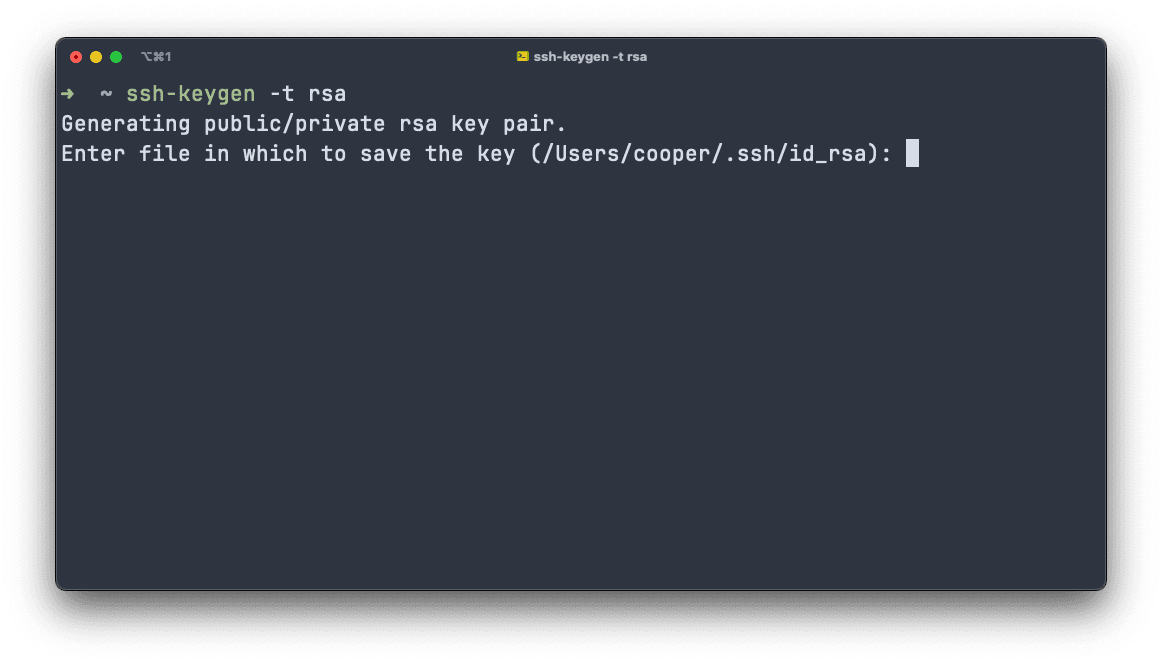
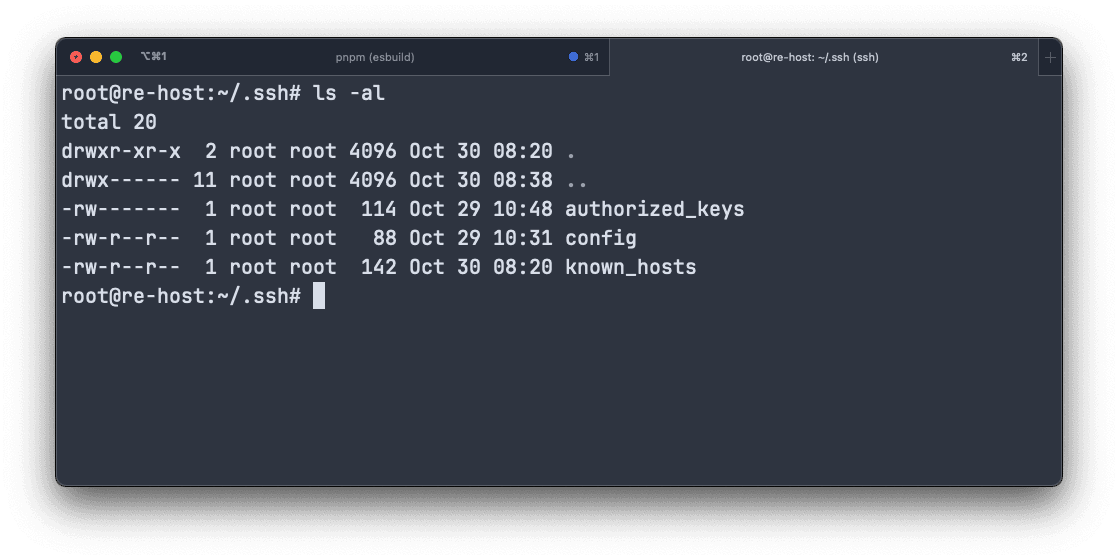
- Next, go to the
/User/username/.sshpath. You will see the two key files just generated:id_rsa_remote_vpsandid_rsa_remote_vps.pub. - Put the newly generated public key on the remote server. You can manually copy the contents of
id_rsa_remote_vps.pubto the~/.ssh/authorized_keysfile on the remote server, or use the command. The-iparameter points to the location of the public key you just generated.
ssh-copy-id -i ~/.ssh/id_rsa_remote_vps.pub root@your-remote-server-ipNow, log in to the remote server and you'll see the authorized_keys file under ~/.ssh/.
- Next, configure the local machine. Create a new file named
configunder the~/.ssh/folder on your local machine. If it's not there, you can usetouchto add it.
touch ~/.ssh/config- Edit the newly created
configfile, enter the remote server IP address, User, and Port you just set. Place the path to the newly added SSH private key inIdentityFile, and finally, enter the name you want to use for the connection inHost.
# ~/.ssh/config
Host remote-vps
HostName your-remote-ip
User someuser
IdentityFile ~/.ssh/id_rsa_remote_vps
Port 20388- Finally, you can connect to the remote server directly via SSH using the name. 🥳
ssh remote-vpsSummary
We've gone all the way from SSH We learned how to connect, how to change the port, and finally how to connect to a remote server without entering a password or IP address. Now I can finally say "SSH" with confidence!
\ SSH! / \ SSH! / \ SSH! /
References
- RFC4252 - The Secure Shell (SSH) Authentication Protocol
- RFC4253 - The Secure Shell (SSH) Transport Layer Protocol
- How to SSH Without a Password (Like a Boss)
- [Linux systemd System Service Management Basic Tutorial and Examples](https://blog.gtwang.org/linux/linux-basic-systemctl-systemd-service-unit-tutorial-examples/ "Linux systemd Basic System Service Management Tutorial with Examples
- IptablesHowTo
- CentOS Linux 7: Setting Up Firewall Rules with the Firewalld Command Tutorial
- Integration with Firewalld
- Three-Way Handshake - Computer Networks